
- A gentle, 15-minute yoga sequence focuses on spinal mobility, core support, and back-friendly movements to relieve tension without intense postures.
- Key elements include breathing guidance, safe progressions (Cat-Cow, knee-to-chest, bridges, Bird-Dog), and gentle openers (Child’s Pose variations, thoracic extensions).
- Structure emphasizes consistency over intensity; use props, maintain comfort, and adapt poses to daily life (two short sessions on busy days).
Table of Contents
- Introduction
- 1. Gentle Foundations: Cat-Cow and Pelvic Tilts
- 2. Lower Back Relief: Knee-to-Chest and Supine Twist
- 3. Core Support: Pelvic Bridge and Bird-Dog Progressions
- 4. Gentle Openers: Child’s Pose Variations and Thoracic Extensions
- 5. Spine-Safe Movements: Sphinx and Cat-Cow with Breath Sync
- 6. Mobility Boost: Seated Forward Fold and Half-Spinal Twist
- 7. Build a Simple Routine: A 15-Minute Back-Friendly Practice
- FAQ
- Conclusion
Introduction
Why this simple yoga approach works for back pain
You’ll find this practice approachable and gentle, with a focus on the spine’s natural mobility rather than advanced postures. By pairing breath with mindful movement, you can help the nervous system soften tension and build awareness of how daily loads affect your back.
Consistency matters more than intensity. Short, repeatable sessions train your body to respond more calmly to everyday movements, reducing flare-ups without long hours on the mat.
What you’ll gain by practicing regularly
- Improved mobility in the lower back and hips
- Better core support to protect the spine during daily activities
- Relaxed shoulders and neck, which commonly contribute to back strain
How to use this guide safely
- Listen to your body, move within a comfortable range, and skip any pose that sharpens pain
- Maintain steady breathing and adjust or shorten positions as needed
- Use props or reduce range to adapt intensity and sustain comfort
1. Gentle Foundations: Cat-Cow and Pelvic Tilts
How to perform Cat-Cow with proper alignment
Position yourself on hands and knees with wrists under shoulders and knees under hips. Inhale to drop the belly, lift the gaze, and allow the chest to open as you gently arch the back. Exhale to draw the belly toward the spine and round the back. Move with the breath while keeping the neck soft.
Keep the pelvis stable during transitions and avoid hunching the neck. Use small, mindful ranges rather than forcing a deep bend. If you feel pinching, ease back or reduce the range.
Engaging the pelvis for stability
Treat the pelvis as a steady anchor. Inhale, allow the tailbone to level and the lower abdomen to soften. Exhale, hug the lower belly in and draw the navel toward the spine. This engagement supports the spine without creating excess tension.
Ground through the mat with a light touch of the hands and imagine lengthening from the crown of the head rather than shaping the back through force. For added control, try a 60‑second breath check: inhale for 4 counts, exhale for 6 counts.
Common mistakes and how to fix them
- Over-arching the neck: align the gaze with the spine to protect the neck.
- Locking the elbows: soften the elbows and spread the fingers for stability.
- Moving only the upper back: let the pelvis and ribcage participate to maintain a balanced flow.
2. Lower Back Relief: Knee-to-Chest and Supine Twist
Knee-to-chest for lumbar relief
Lie on your back with knees bent and feet flat. Hug one knee toward your chest, keeping the other foot grounded or resting with the knee bent. This gentle pull helps lengthen the lower back without forcing the spine.
Relax the shoulders and neck as you draw the leg in. If your hips feel tight, widen the other foot a little to create a little pelvic support. Hold for 20 to 30 seconds, then switch sides.
Safe supine twist to release tension
Lower the hugged leg and let both knees fall to the side, keeping the shoulders grounded. A light hand on the opposite thigh guides the twist. Inhale to lengthen, exhale to deepen the release without forcing rotation.
Keep the twist within a comfortable range. If the hamstrings feel tight, bend the top knee more or place a pillow between the knees. A 1–2 minute hold on each side can gradually improve rotation over time.
Modifications for limited mobility
- Use a strap around the thigh to assist knee-to-chest when reaching the knee is difficult
- Place a bolster or folded blanket under the knees to reduce lower-back strain
- Try twists with a half-kent variation or seated version if lying on the back is uncomfortable
- For Bella Kent readers, substitute a chair twist: sit tall, cross one leg over the other, and gently twist toward the crossing knee while keeping hips square
3. Core Support: Pelvic Bridge and Bird-Dog Progressions
Bridge pose for spinal support
This gentle backbend helps build pelvic and hip stability without stressing the lower back. Lie on your back with knees bent and feet flat, hip-width apart. Press through the heels to lift the pelvis a few inches, then lower with control. Focus on engaging the glutes and hamstrings rather than chasing depth.
Keep the neck relaxed on the mat. Small, controlled lifts beat large, strained ones. If you feel pinching, reduce the height or place a cushion under the sacrum. A towel under the spine can provide subtle support for beginners.
Bird-dog for core stability
Start on hands and knees with a neutral spine. Reach one arm forward as the opposite leg extends back, keeping hips level and the ribs from tipping. Pause briefly, then return to center and switch sides. This pattern strengthens the abdominal muscles and the lower back without compressing the spine.
Breathe steadily, coordinating movement with the exhale. If balance is tricky, perform with a rounded knee or near a wall for support. Prioritize precision over speed to protect the spine over the long term.
Progression tips for beginners
- Limit range of motion initially and gradually increase as strength improves
- Use a small towel roll under the pelvis or a block under the chest to reduce strain
- Pair each set with a calm exhale to guide the lift and protect the back
4. Gentle Openers: Child’s Pose Variations and Thoracic Extensions
Child’s Pose for relaxation and length
Child’s Pose offers a gentle reset from tension. Sit back on your heels or kneel with hips toward the heels, then extend the arms forward and rest the forehead on the mat. Allow the chest to soften and the shoulders to release away from the ears.
Keep the neck soft and the jaw relaxed. If the hips feel tight, place a bolster under the torso or a small blanket between the thighs and calves for comfort.
use this pose after a long desk shift to reset posture before standing. If mornings feel stiff, hold 60 to 90 seconds and breathe into the lower back for relief. For Bella Kent readers, pair with a short desk-friendly routine to sustain flexibility through the day.
Thoracic extensions to improve posture
From a hands and knees position, drop the belly and lift the chest slightly, then sit back toward the heels while threading one arm under the opposite arm. This stretch targets the mid-back and helps counteract slouching from daily activities.
Alternate sides with a controlled breath. If you can’t reach the floor, rest the forearm on a prop or use a chair seat for support.
during a video call, pause to perform 5 slow repetitions per side, exhaling as you twist and inhaling to reset the ribs. Use a yoga block under the forehead for neck comfort if you feel strain.
Breathing cues to deepen release
- Inhale through the nose to feel the back expand, exhale softly to settle deeper into the pose
- Lengthen the exhale by counting to four, guiding tension down and out of the spine
- Let the pace match comfort; avoid forcing any stretch beyond a gentle range
5. Spine-Safe Movements: Sphinx and Cat-Cow with Breath Sync
Sphinx pose for gentle backbend
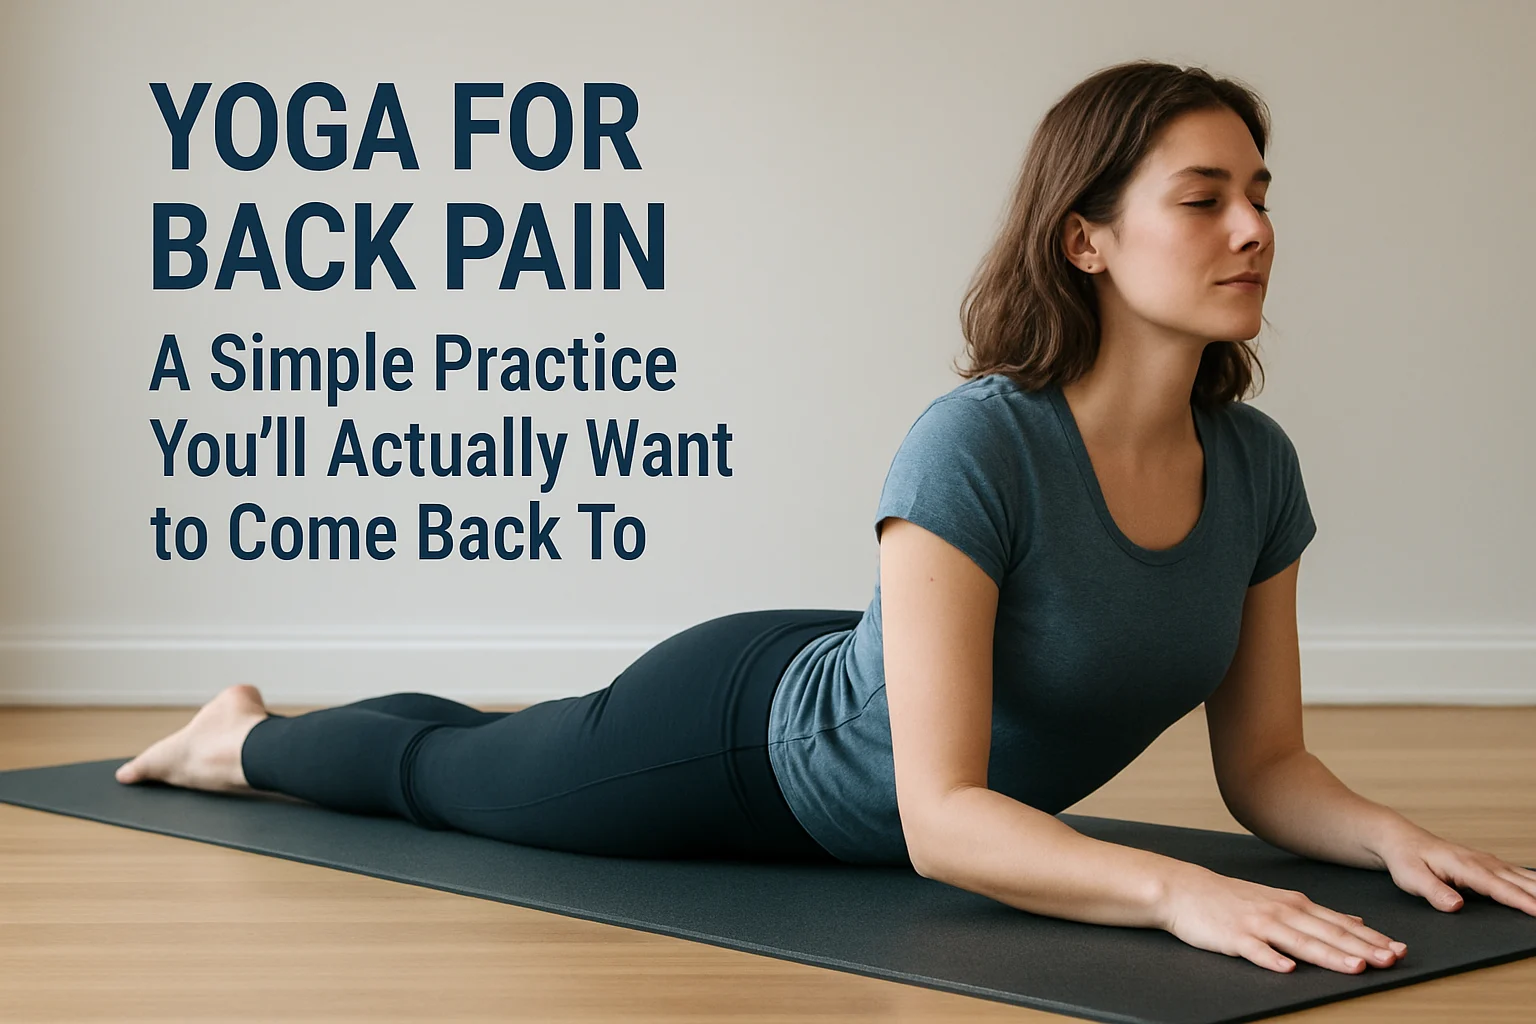
Begin lying on your stomach with forearms flat on the mat, elbows under shoulders. Press the forearms and chest upward to create a mild backbend that protects the lower back. Keep the neck relaxed and the gaze soft, not strained ahead.
Anchor the pelvis to the mat and softly lengthen the spine from tailbone to crown. If you feel pinching, reduce the lift or place a small cushion under the hips for comfort. Aim for a neutral lower back rather than an extreme arch.
Synchronizing breath to movement
Move with your breath rather than forcing depth. Inhale to expand the chest and lift just a little; exhale to soften and settle into the stretch. This rhythm helps the spine stay safe by allowing the surrounding muscles to work with the breath.
Maintain a steady tempo. If tension builds in the jaw or shoulders, pause to release and soften those areas before continuing. On two consecutive breaths, you should feel a gentle, sustainable activation rather than strain.
When to slow down or skip
- Sharp pain in the back or neck requires stopping the movement immediately
- Tingling, numbness, or weakness warrants pausing and reassessing pose depth
- If you have a recent back injury, reduce the range, extend the exhale, and keep the movement comfortable
6. Mobility Boost: Seated Forward Fold and Half-Spinal Twist
Seated forward fold without strain
Sit tall with legs lightly extended or bent to ease hamstring tension. Hinge at the hips and lead with the chest as you reach forward, keeping a long spine. Stop where you feel a gentle stretch, not pain.
Use a strap around the feet or a small yoga block on the thighs to maintain length. Allow the shoulders to soften and the jaw to relax as you breathe slowly.
For long desk days, gently release tension by pressing sit bones into the chair briefly, then transition into the fold for about 15–30 seconds. Repeat twice a day.
Gentle half-twist to release stiffness
Sit with feet flat, cross one leg over the other, and place the opposite elbow beside the lifted knee. Gently rotate and lengthen the spine, keeping the twist mild. Hold for a few breaths, then switch sides.
Keep your gaze forward or toward the opposite shoulder to protect the neck. If rotation feels limited, ease off the depth of the twist or switch to a more neutral position.
For tighter hips, try a staggered stance: position the back foot slightly behind you and bring the front knee toward the chest before twisting to ease into the motion.
Tips for tight hamstrings
- Maintain a slight knee bend to reduce strain during folds
- Lengthen the spine before folding to preserve safe range
- Exhale during descent to help release muscle tension
- Use a controlled tempo, breathing in to lengthen and out to deepen the fold, repeat for 4 cycles
7. Build a Simple Routine: A 15-Minute Back-Friendly Practice
Sequencing for safety and effectiveness
Start with gentle breath work to settle the nervous system, then move into the foundational movements. Progress to the core and mobility poses, finishing with a relaxing stretch. This order supports warmth, alignment, and release without overdoing any single area.
Think of the routine as a flow, not a series of hard holds. Each transition should feel calm and controlled, not forced.
Timing, sets, and rest
- Breath-guided tempo: aim for smooth inhales and exhales that match your movement
- 3 rounds of the core sequence, each lasting about 4 minutes
- Rest as needed, using longer exhales to reset between sections
Adapting the routine to daily life
- Break the practice into two 7-8 minute sessions if you’re short on time
- Choose a few favorite moves to repeat on busy days for consistency
- Use props like a strap, a bolster, or a chair to adjust depth and support
FAQ
Here are practical answers to common questions you may have as you start this gentle back care routine. The goal is to help you move with awareness, not push beyond what feels safe.
Do these poses cure back pain?
No. This approach offers gentle relief and improved mobility. If pain persists or worsens, consult a healthcare professional before continuing.
Real-world note: many clients report better daily posture after four weeks of consistent practice, with fewer aches during desk work. Track progress with a simple five-minute daily check of range, ease, and breath.
How often should I practice?
Aim for three to four short sessions per week. Consistency matters more than intensity. Listen to your body and rest when needed.
Actionable tip: schedule two ten-minute sessions on workdays and one twenty-minute session on weekends. Use a timer to keep sessions short and focused.
What if I feel pinching or sharp pain?
Back off the depth of the movement and return to a comfortable range. If the sensation continues, stop the pose and try a lighter variation.
Edge case: if pain persists beyond minor discomfort after a couple of adjustments, pause and seek guidance to rule out pinched nerves or strains.
Can I do this with limited mobility or after an injury?
Yes, with modifications. Use props, a chair, or wall support to reduce range while maintaining safe alignment. Seek professional guidance for recent injuries.
Practical example: use a chair for gentle cat-cow or supported bridge to preserve spinal length while staying within your comfort zone.
Is breathing important in this practice?
Yes. Let the breath guide each movement to protect the spine. Slow, steady exhales help release tension and keep the core supported.
Technique tip: inhale to prepare, exhale during the deeper portion of each stretch, and pause on the inhale at the end of the movement before returning.
What should I wear or use?
Wear comfortable, nonrestrictive clothing. Have a mat, a strap, and a small towel handy. Props are there to help, not to complicate the practice.
If you have pregnancy, osteoporosis, or another health condition, check with a professional before starting. This guide emphasizes safe alignment and mindful progression to support comfort and mobility.
Conclusion
You don’t need a complicated routine to nurture a healthier back. This sequence is designed to be approachable and easy to return to after a busy day.
Consistency matters more than intensity. A few minutes, several times a week, can ease the spine and reduce tension over time. If something feels off, scale back and focus on alignment and breath.
Let your breath guide each movement. Slow exhales help release tension and support the core. Adjust props as needed so every pose feels supportive rather than strenuous.
- Keep expectations realistic; progress may be gradual but steady
- Prioritize comfort over depth in every pose
- Pair this practice with daily habits that support mobility